Gentle introduction to Terminologue
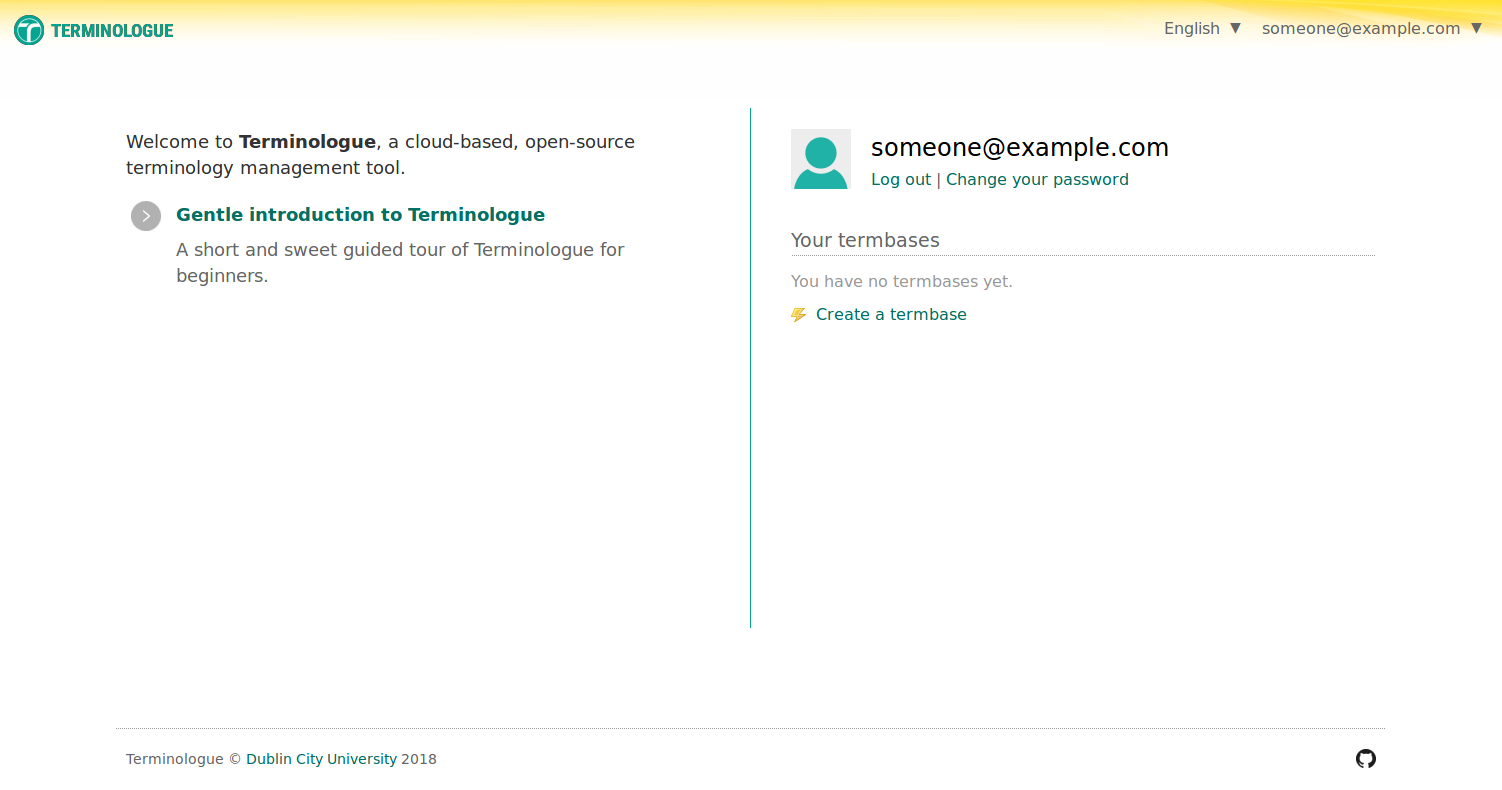
This page is a brief walk-through of Terminologue’s most important features. To start using Terminologue, go to the home page and open an account. Once you have an account you can log in using your e-mail address and password. When you are logged in, the home page has a section titled Your termbases. The section is empty at first but there is a link to create a new termbase.
You can create as many termbases as you want and you can always delete them later. When creating a new termbase, Terminologue will ask you what URL you would like for the termbase. Each termbase in Terminologue has its own URL, such as www.terminologue.org/mytermbase. If and when you decide to make your termbase publicly available, it will be available at that URL.

If you are new to Terminologue, it is recommended that you select a template in the drop-down list, for example Simple Bilingual Termbase. Your termbase will come preconfigured with certain settings (which you can change any time later) as well as a few sample entries (which you can delete).
Once your termbase has been created you can go to its homepage and from there to the editing interface. This is where you create and edit terminological entries. There is a list of entries on the left-hand side. You can delete the sample entries if you want, and you can create as many new entries as you want. There is no upper limit on the number of entries your termbase can contain. To open an entry, click on it and it will appear on the space on the right hand-side.
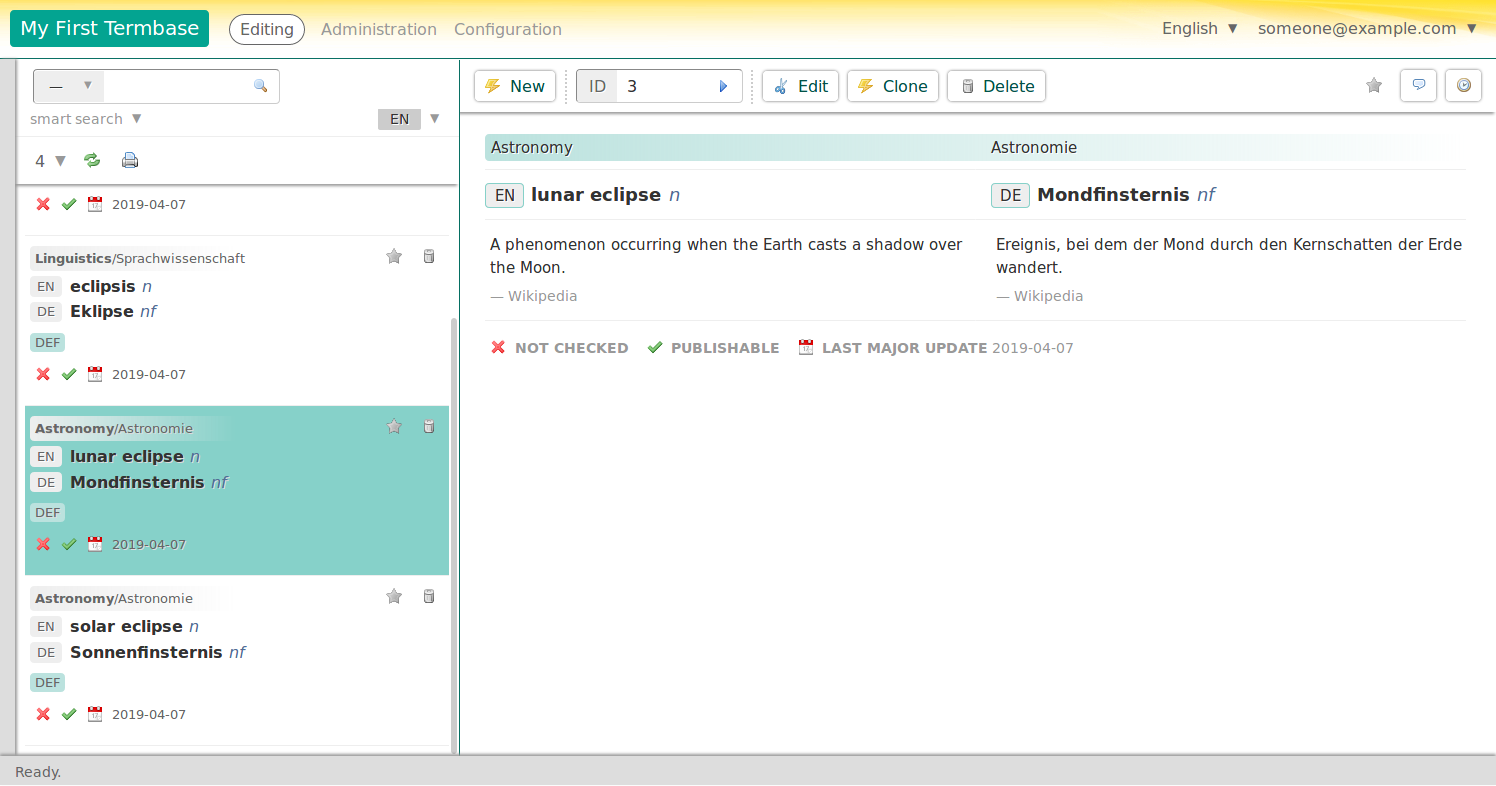
What you see here is a formatted rendering of the entry. This is what the entry will look like if and when you decide to make your termbase public. To edit the entry, click the Edit button at the top. Terminologue opens the entry for editing.
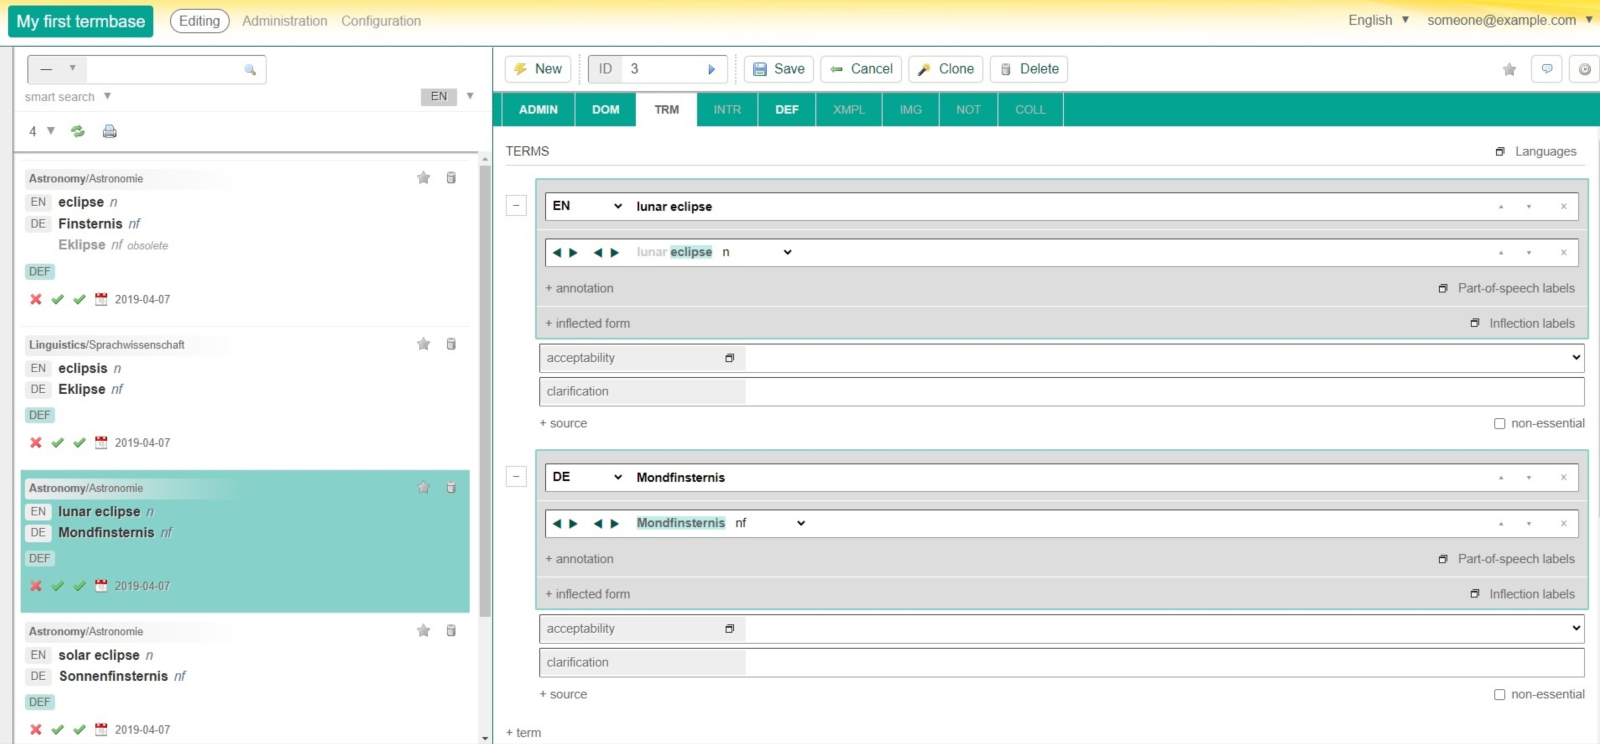
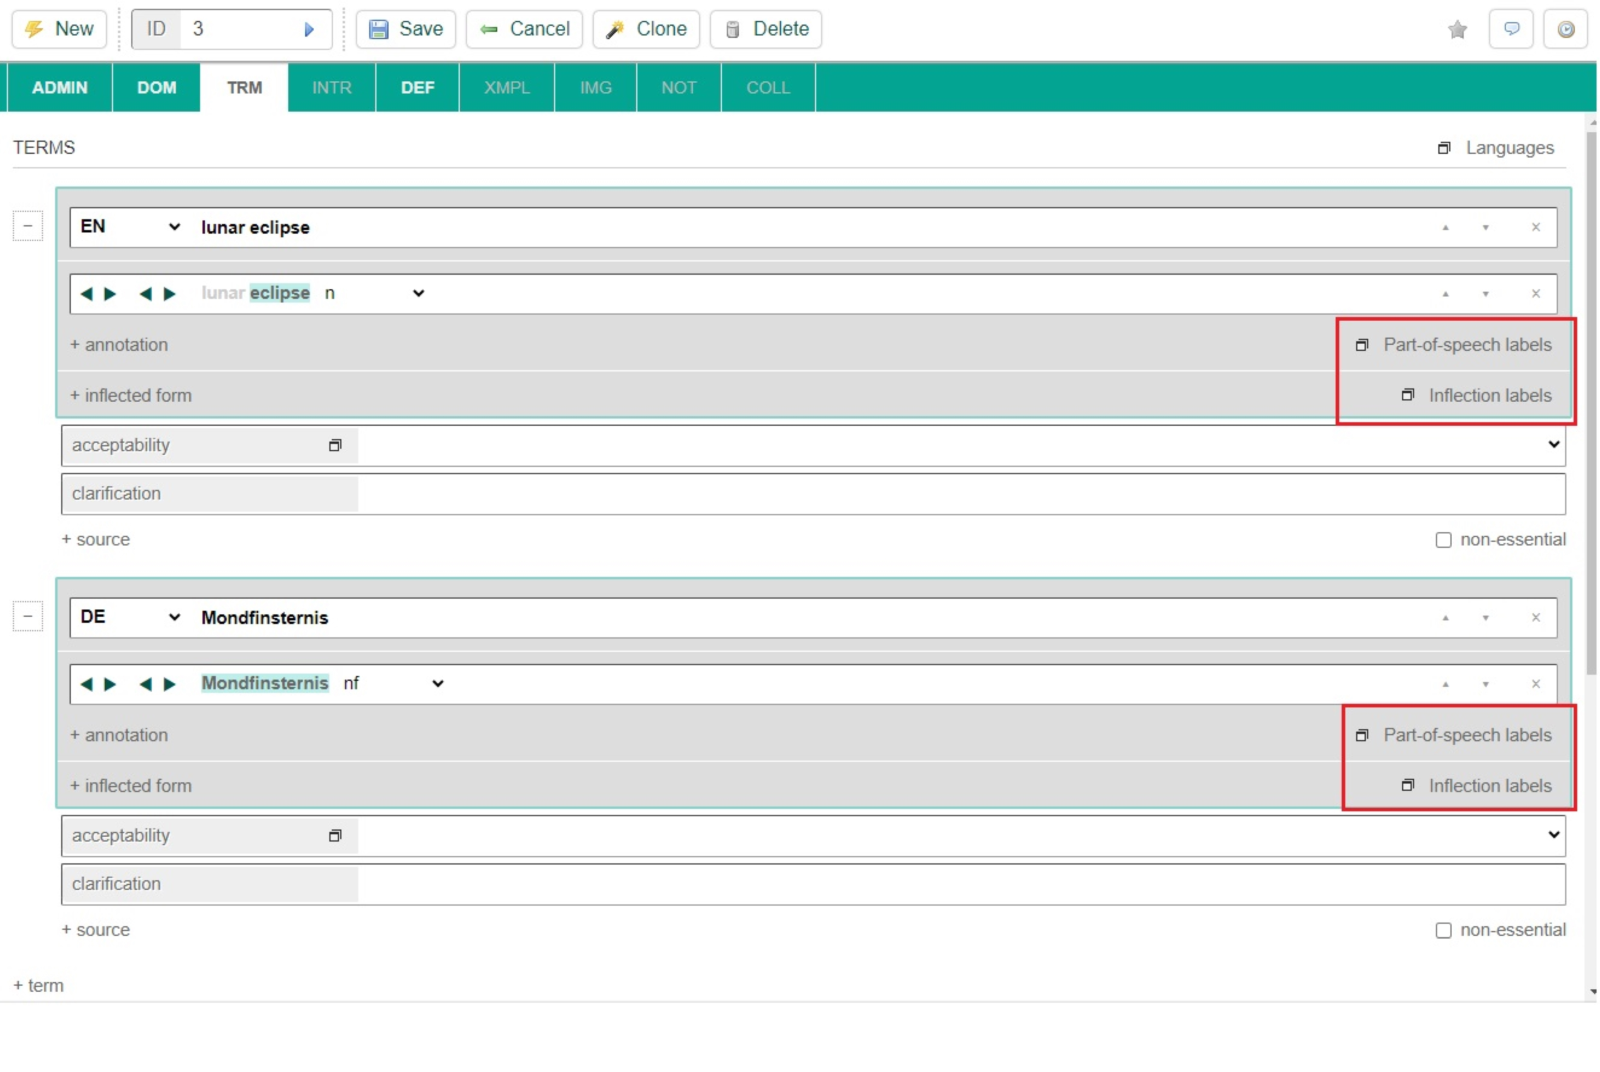
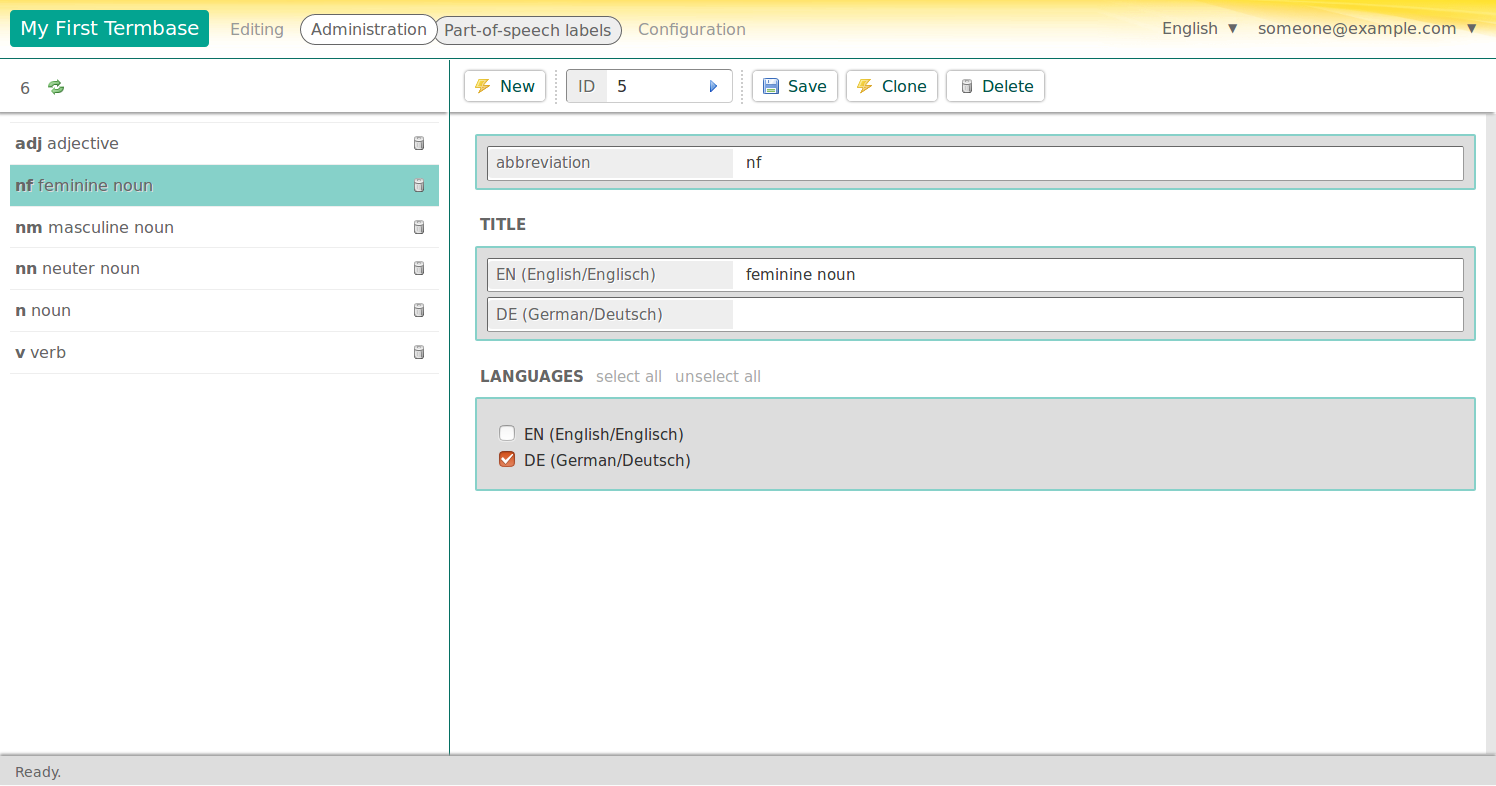
Each entry in Terminologue represents a concept, and each concept consists of elements such as terms, definitions, domain labels and so on. The tabs at the top allow you to edit these: you can edit the entry’s terms under the TRM tab, its definitions under the DEF tab, add images under the IMG tab and so on. For example, to add a new term to the entry, click the plus sign under the TRM tab and fill in the wording of the term. Once the term has been added you can add more information to it, for example a part-of-speech label, a transfer comment, or one or more inflected forms. Once you have finished editing the entry, do not forget to click the Save button at the top (or use the Ctrl + Shift + S keyboard shortcut).
Editing an entry basically means typing text into boxes and selecting values from lists. Many of the lists of values, such as part-of-speech labels, domain labels and so on, constitute the termbase’s metadata and can be configured individually for each termbase both here in the Editing section as well as in the Administration section. If you started your termbase from a template, then you will already have some metadata preconfigured here.
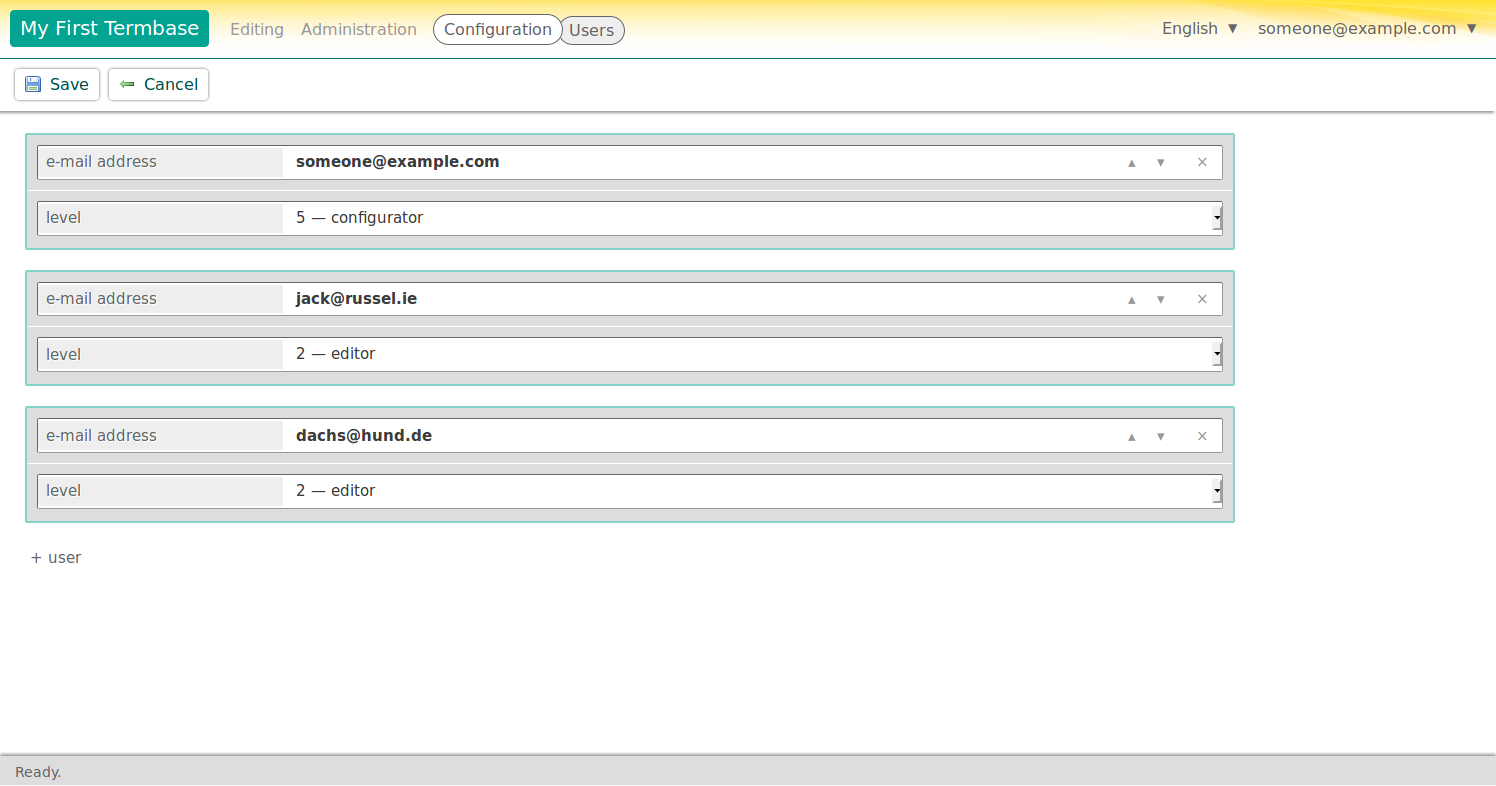
Other properties of your termbase can be configured in the Configuration section. One important thing you have control over is who has access to the termbase and who can make changes there, besides yourself. This can be found under Users. You will see your own e-mail address listed there. This means that you have access to this termbase. You can add other users here and configure their access privileges (for example: some users can edit entries and others cannot, some users can only edit entries but cannot delete or create them, some users cannot edit metadata, and so on). Any user on this list will have access to your termbase – provided they have a Terminologue account. The next time they log in, they will see the termbase listed under Your termbases on the Terminologue homepage.
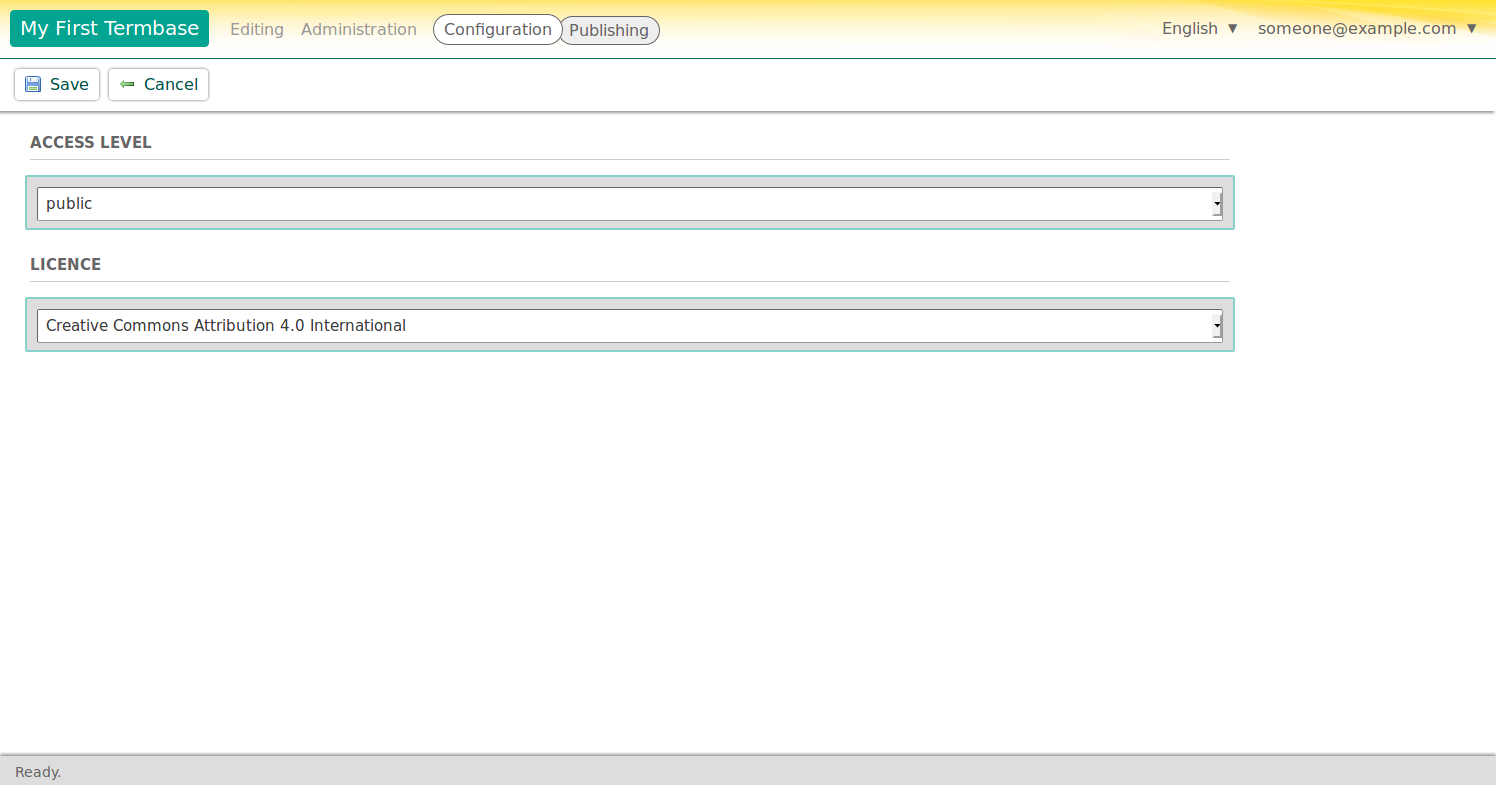
Terminologue is not just a tool for editing termbases, it is a tool for making termbases publicly available on the web, too. To make a termbase publicly viewable, go into Publishing in the Configuration section and change the setting from Private to Public. You can also change the termbase back to private any time. You can even decide which entries are publicly visible and which are not: any entry can be labelled as hidden in the editing interface and it will then not be visible publicly, even if the termbase as a whole is public.
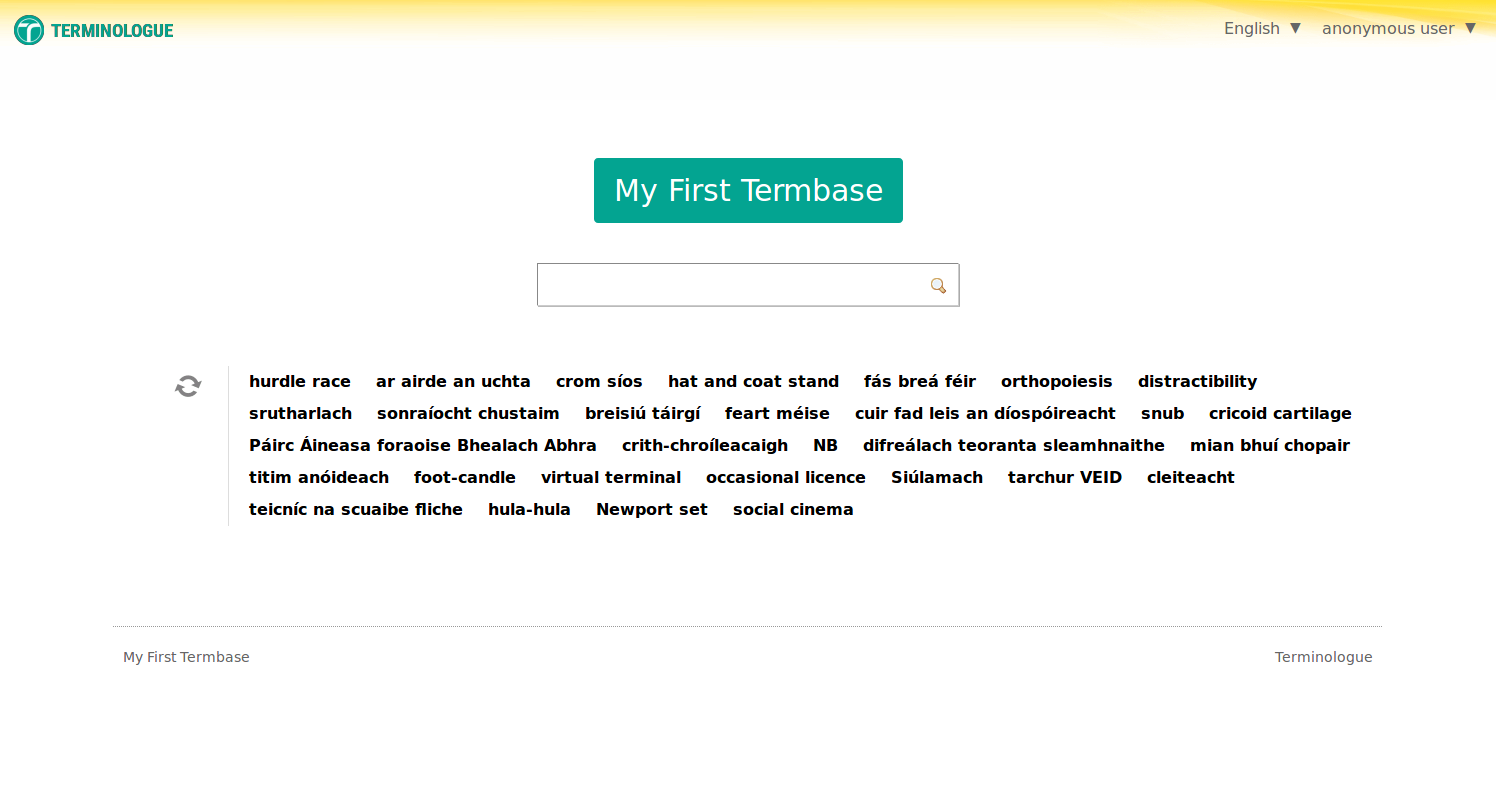
From the moment you make your termbase public, its homepage (for example www.terminologue.org/mytermbase) will display a textbox where people can search your termbase. The public presentation of your termbase is optimized to be easily discoverable by search engines such as Google and Bing. All publicly viewable pages have responsive design and render well on screens of all sizes, from large desktop computers to small mobile devices.
Now that we have seen how to use Terminologue to create, edit and eventually publish a termbase, let us zoom in on some of the more interesting features of Terminologue.
Searching and finding
As we have seen, the editing screen is divided into two halves: a list of entries on the left-hand side and a space for viewing and editing an entry in the right-hand side. The search box at the top of the entry list allows you to search the termbase.
A drop-down list underneath the search box allows you to select the search mode. The options are complete term, start of term, end of term and a few others. These modes perform simple character-by-character matching. But the default option in the drop-down list is smart search which performs a linguistically intelligent search. The list of entries you obtain from smart search is ordered in such a way that entries which match your search text more or less completely and exactly are at the top, followed by multi-word entries which contain the search text as a word. This matching is inflection-aware. Terminologue has access to a large database of inflected forms of words in many different languages, so for example, a search for ‘walk’ will find terms containing ‘walking’, ‘walked’, ‘walks’ and so on. Another feature of smart search is that it performs spelling correction and offers spelling suggestions on the right-hand side of the text box.
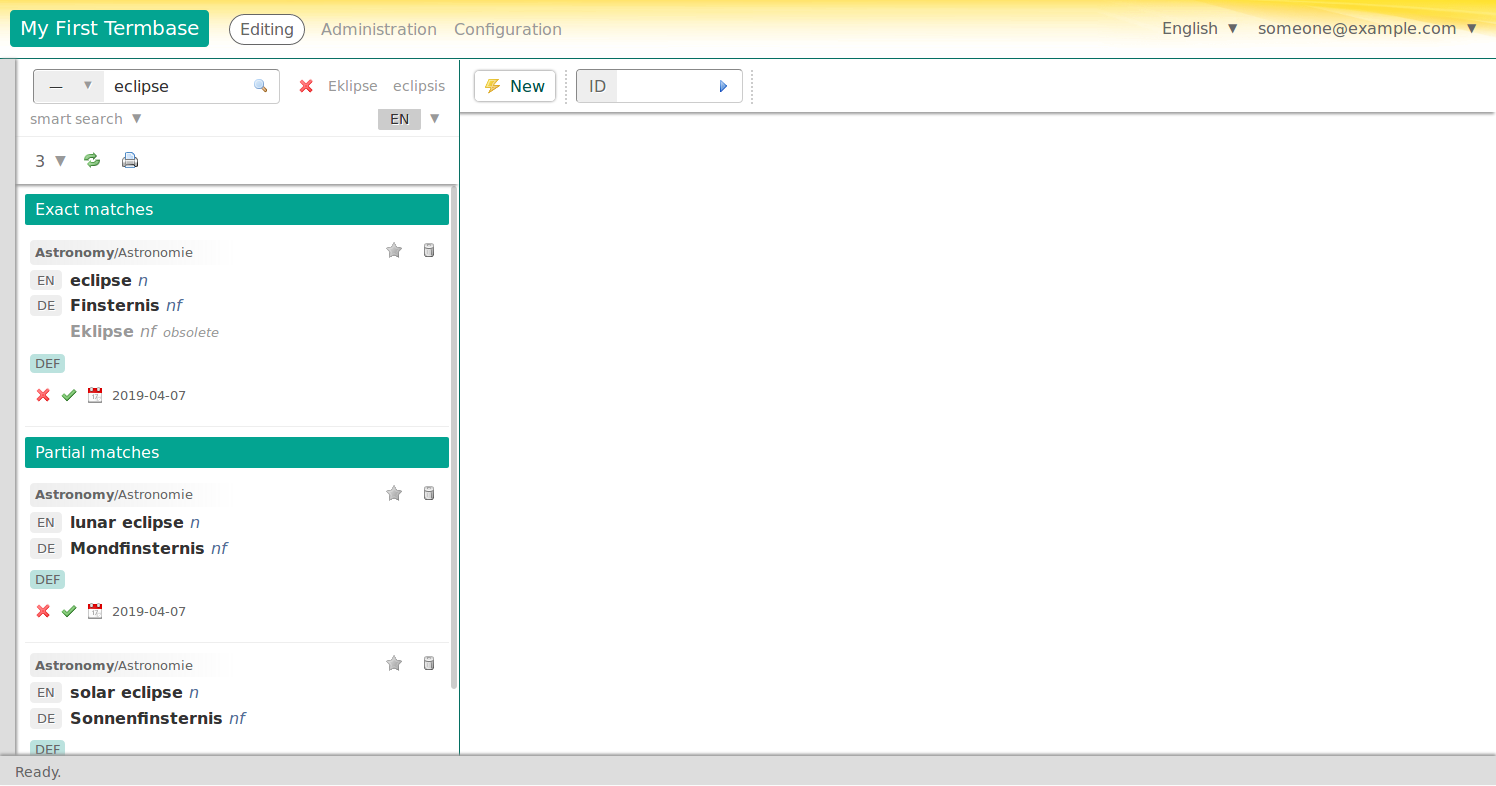
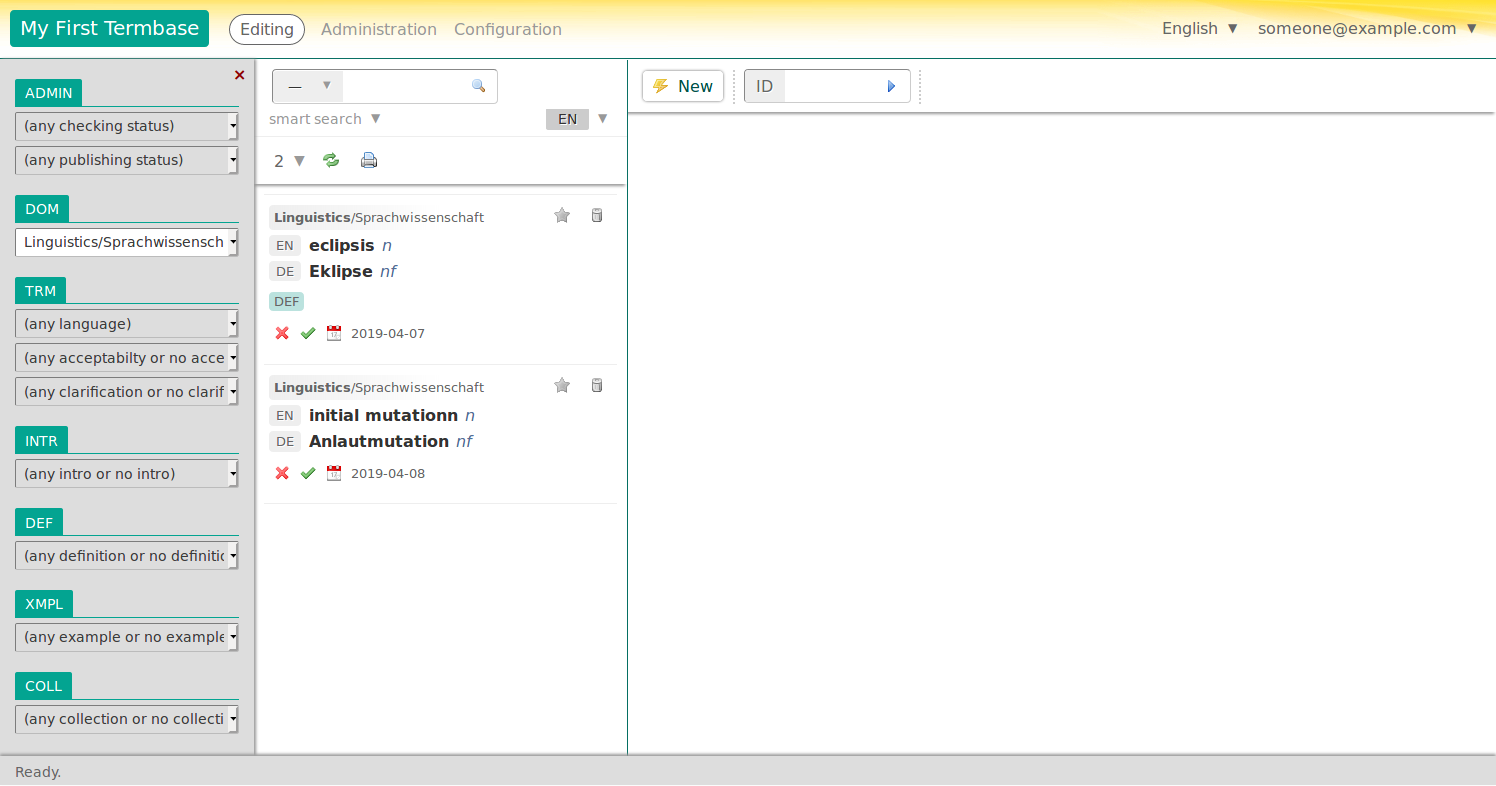
Searching is not the only way to navigate around a termbase. Terminologue also offers faceted filtering where you can filter the entry list by various criteria such as domains, editorial status and others.
Inline grammatical annotations
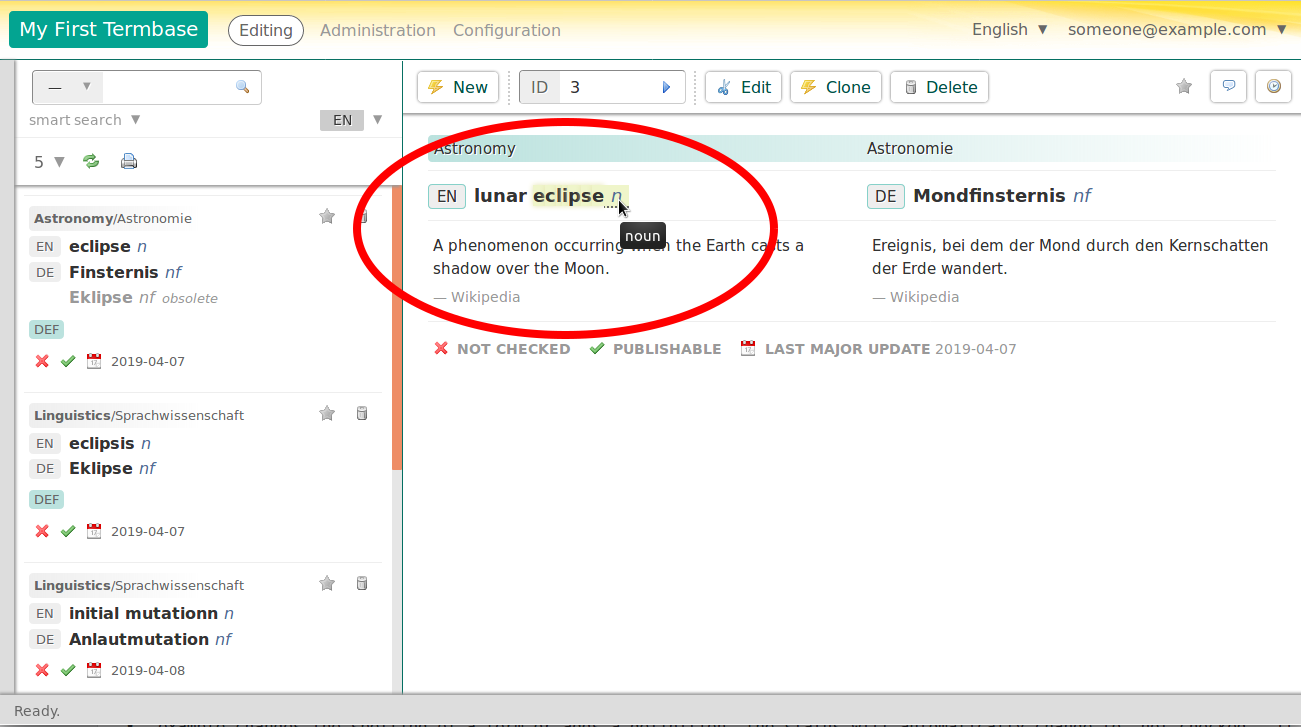
It will surprise no-one that, in Terminologue, you can attach part-of-speech label and other grammatical labels to terms. But what's really special about Terminologue is that it lets you attach grammatical labels to individual words in multi-word terms. When attaching a grammatical label to a term, you can optionally tell Terminologue which substring of the term it applies to. Then, when Terminologue is displaying the term in the formatted rendering of the entry, it will insert the label into the term at the correct location. The user can mouse-over the label and Terminologue will highlight the substring it applies to.
Term sharing
Another innovative and unusual feature of Terminologue is that a term can be shared among multiple entries. When a term is shared, Terminologue communicates that fact to the user with an icon beside the term. You can click the icon to see which other entries share this term. But most importantly, the icon is there to warn you that if you make any changes to the term here, the same changes will automatically apply the other entries too.
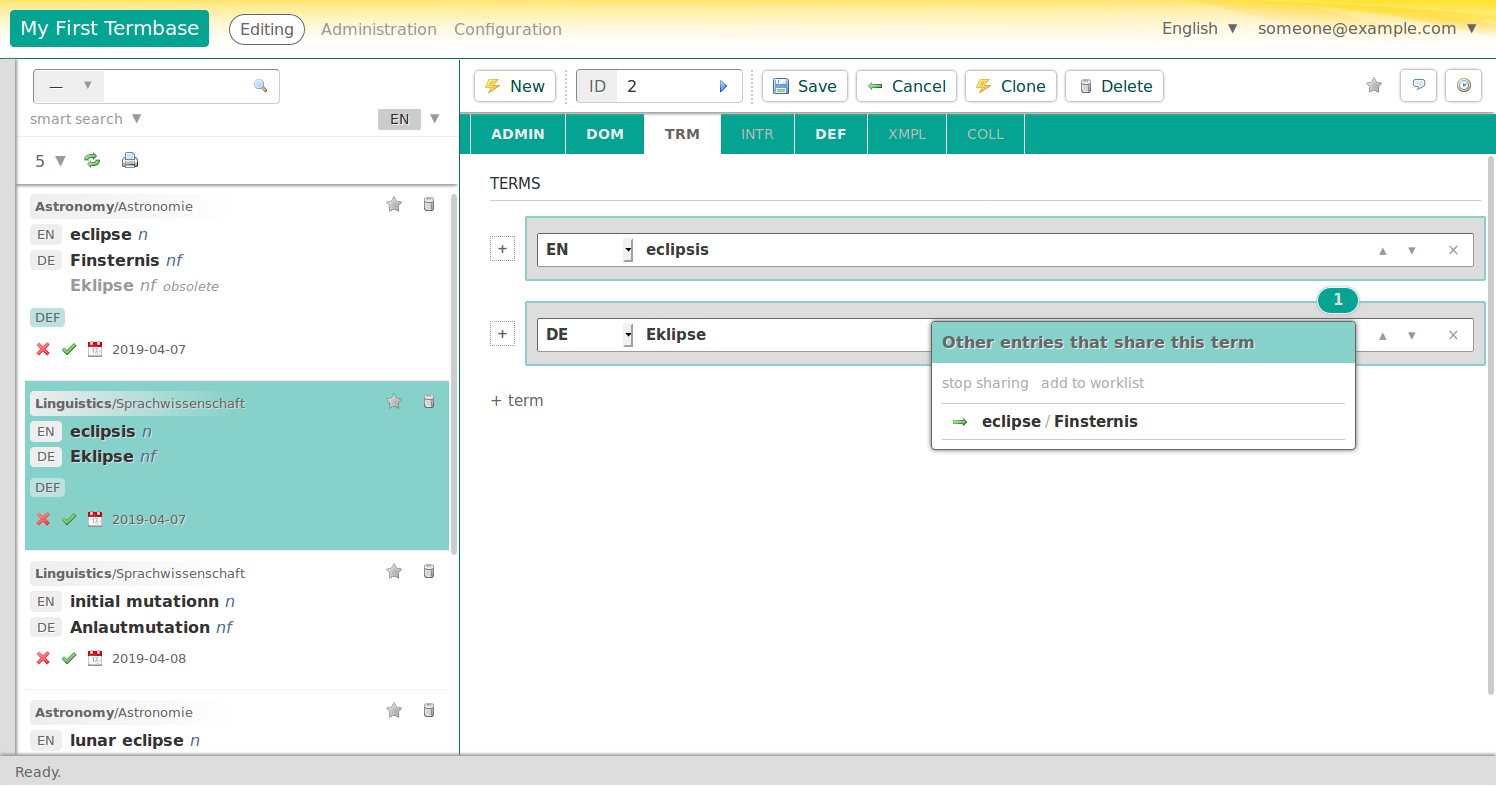
Term sharing is intended to save human editors work and to enforce consistency. So, when adding a new term to an entry, Terminologue will tell you if such a term already exists elsewhere and will give you the option to link that term instead of creating a duplicate. Term sharing is useful if terms in your termbase are richly annotated with grammatical labels and inflected forms.
Entry status
Every entry in Terminologue has a status label which is either ‘checked’ or ‘not checked’. When a user creates a new entry it is ‘not checked’ at first, and only users with administrator privileges can change them to ‘checked’. Also, when a user makes certain edits to an existing entry, for example changes the spelling of a term or adds a definition, the status will automatically change to ‘not checked’. It is possible to configure individually for each termbase which kinds of edits trigger this change (under Configuration → Automatic changes).
Users with administrator privileges can use Terminologue’s faceted search feature to obtain a list of unchecked entries and review them periodically. The purpose of this feature is to help with quality control on large termbases where large teams cooperate.
User privileges
Every user in every termbase is assigned one of five access levels which determine what actions the user is or is not allowed to do in the termbase. Levels can be assigned to user under Configuration → Users. The levels are:
- ‘Reader’: the user has read-only access, can look at entries but cannot make any edits.
- ‘Editor’: the user can change existing entries, but cannot create or delete entries.
- ‘Creator’: same as Editor, but can create and delete entries.
- ‘Administrator’: same as Creator, and can edit metadata (domain lists etc.), can change the status of entries, and can create extranets (see below).
- ‘Configurator’: same as Administrator, and can make changes to the termbase’s configuration, which includes potentially destructive operations such as deleting the termbase.
History log
Terminologue keeps a log of every change to every entry and it is possible to see the history of each entry in the editing interface. The log shows who saved each version and when, and what the changes made were. From the log it is possible to revert changes by bringing previous versions back to life by clicking the Revive link which appears when you hover the mouse on it. It is also possible to undo the deletion of an entry.

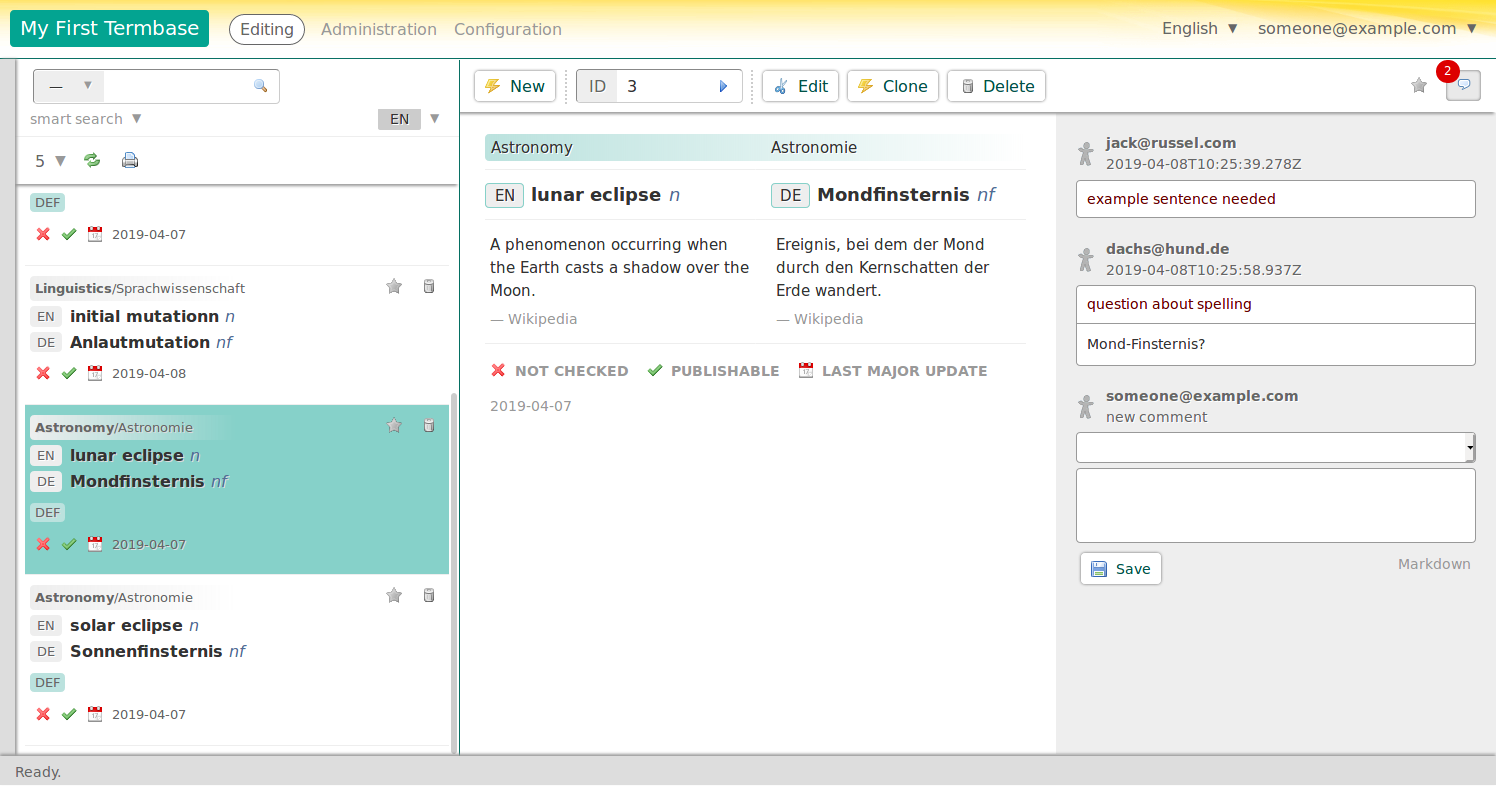
Notes and comments
Entries in Terminologue can contain notes. Note types, which can be configured in the termbase’s Editing section as well as the Administration section, can have one of three access levels:
- private note, not shown on extranets
- private note, shown on extranets
- public note
Entries in Terminologue can also be annotated with arbitrary prefabricated comments and comments. These are for internal purposes and will never be visible publicly. The difference between prefabricated comments and comments is that there is a fixed list of prefabricated comments which a user can choose from in a drop-down list (these can be configured in the termbase’s Administration section) while comments can be any text. Comments and prefabricated comments can be paired, so the prefabricated comments can give the comments a type (saying what kind of comment it is).
Exporting
At the end of the displayed list of term entries in the Editing section, you have the option to export a list of terms either in TBX or TXT format. You can click on either of these buttons to export your desired list of terms in either format. To specify the terms you want, select the number of terms to be displayed per page just above the TBX and TXT options. Exporting a termbase in TBX format can also be carried out under the Configuration section by clicking TBX Export.

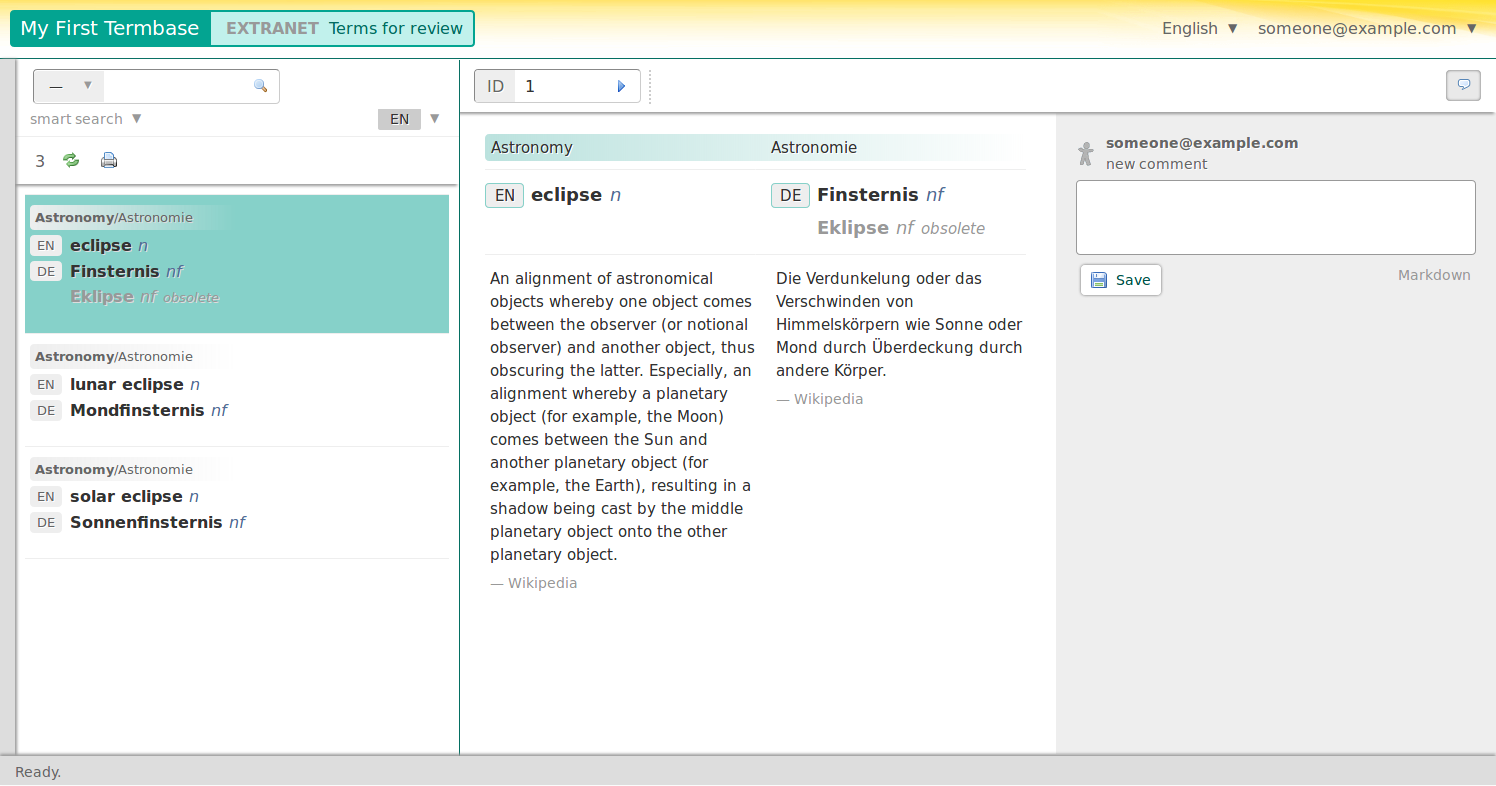
Extranets
An extranet is a special section on the Terminologue website where a subset of a termbase has been made available for commenting to a closed group of external users. Users of a termbase with Administrator privileges can create new extranets, decide which entries go on which extranet, and decide which users have access to which extranet. Extranet users are completely separate from other users of the termbase: they must have an account in Terminologue but, apart from that, they do not (need to) have access to the termbase itself. Comments left by extranet users are visible in the editing interface (as notes) and their purpose is to inform the termbase editor’s decisions.
Conclusion
This brings us to the end of this introduction. Terminologue has a number of other features which we did not cover here and you will surely discover them as you use Terminologue. But most importantly, build great termbases!